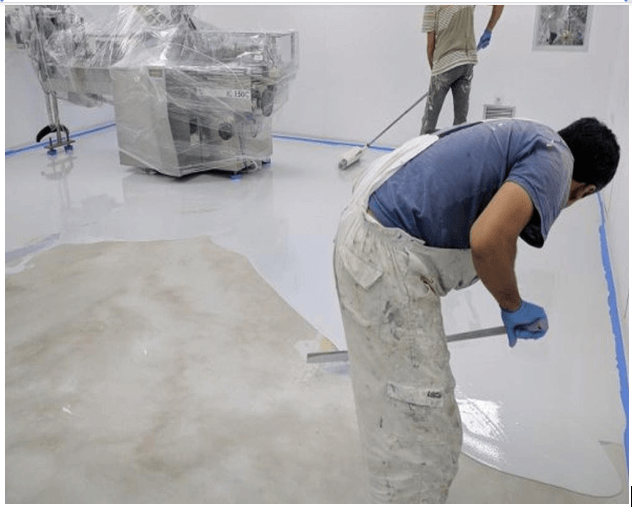
Self leveling Cement is a suitable alternative for traditional concrete material. It offers an evenly smooth surface with compressive strength. Whether you are remodeling or want to level an uneven surface, self-leveling cement is the best choice for your floor. It is easy to use and can provide a flat finish to your floors.
You can level your floors by yourself using the right equipment and techniques. All it takes is the planning and right preparation depending on your construction needs. You can also hire a professional company to pour Self Leveling Cement if you aren’t ready to do it yourself.
This article includes basic information and guidance about self-leveling cement. In case you want to level your floors by yourself, continue to read on. We’ve written a step-by-step guide smart guide for you.
Read more: What are legal implementations when buying a property?
Types of Self-Leveling Cement
Self-leveling cement is available in the market in two different forms. The first type is a ready-to-use powder with a separate latex liquid container. The buyer just has to mix the two to prepare the self-leveling cement.
The second form comes in a bag of powder which includes both, the powder and latex. This type of compound is easy to use for beginners. You just have to mix the water with the compound and Voila!
Marking High and Low Points on the Floor
Self-leveling cement can be used to fill cracks and level the existing floors. There are various ways to measure whether or not your floor is evenly leveled.
A. Finding Uneven Points
Sweep over the floor to expose any depressions and mark them with pencil or chalk. Mark all the high or low points that are clearly visible. Similarly, spot dips or concrete bumps that are present on the floor.
B. Using Spirit Level
An easy way is to place a long spirit level on the floor. You can use self-leveling cement on the floor if the bubble is less than 5mm out of level.
C. Use Marble Balls
In case you don’t have a spirit level, you can also use golf or marble balls. Follow the process mentioned below to measure the evenness of your floor.
Read more: Outdoor Porcelain Pavers – Do They Stack Up?
- Strip off tiles, rugs, carpets or other existing floorings
- Remove any nails, tile adhesive, carpet gripper or tape
- Thoroughly brush the floor to clear the debris
- Drop a golf or marble ball on the floor at various positions
- The ball will indicate the low points by rolling towards those points
Using a marble ball can give you a basic idea about your floor. However, it couldn’t clarify how uneven your floor is. It also fails on floors that have an inclined surface.
D. Measuring the Level on Large Scale
In case you want to have a clear idea, use a long spirit level. This can help you find out how much your floor is out of level. A 6-foot long level can provide a clear idea. You can also measure the floor ends of an inclined floor through this method.
How to Use the Self-Leveling Cement
There are certain steps that you should follow before pouring self-leveling cement.
1. Cleaning the Floor
Once you have taken everything out, ensure that the floor is clean and clear. Make certain that the surface doesn’t have any dust on it and then prime the surface.
2. Fill the Cracks
If your floor has any large cracks, use a sealer or filler to fill them. You can press concrete by putting the nozzle into the cracks. Also, allow the filler to dry out before you go further with the process.
3. Applying the Primer
Apply the primer after cleaning the floor and filling cracks. Use a soft-bristle push broom to spread the primer over the entire floor. Apply downward pressure to apply the primer thoroughly into the pores. Leave the floor to dry for 6 to 24 hours after applying the primer.
4. Mixing the Compound
Always mix the compound inside a container and use a mixing paddle. Never mix more than one bag if you are pouring self-leveling cement by yourself. You’ll only have 15-30 minutes to pour the cement onto the floor. It is better if you have a partner to work with while pouring self-leveling cement.
Working with a partner can ease out the process. In this way, one person can prepare the self-leveling cement and the other can pour and spread it.
5. Let It Dry
Allow the self-leveling cement to dry once you have spread it. Follow the manufacturer’s guidelines and allow it to settle. Usually, self-leveling cement settles down after 4 to 6 hours and you can walk on it.
Takeaway Words
Self-leveling cement is a construction material just like traditional concrete. However, it has more benefits than other construction materials. It dries quickly and you can use it to level your existing floors. Plus, self-leveling cement is easy to mix and requires less labor.
